planning themes - butterflies


Our garden fairy theme is starting to morph into...
a butterfly theme!

I am busy in the planning stage and loving it,
 'pinning' ideas to my Pinterest Butterfly board
and making lists of good reference/story books at our library for my records.
Our library has an online service that allows me to put books on hold from other branches and have them sent to my branch for pick up.  I also use the online booklist to keep track of our favourites.
Very handy tools for busy Mums!

'A' chasing a blue morpho (age: almost 4...sigh!) 2006

During July we will be:

 ~ revisiting this Butterfly House
(that I used to work at years ago)

~ looking at butterfly wings under the microscope

~ drawing, painting, folding, and making 3D butterflies
(I have come across SO many fun art projects!)


~ decorating the house and garden with butterfly themed items

~ learning the body parts of the butterfly and caterpillar


~ learning how to identify butterflies and moths

~ playing butterfly math games

~ following the monarch's migratory route on the map

 
~ baking butterfly cookies

~ and reading lots of books!!!

...some of my favourites so far are... 

And here are a few links that I'll be referring to for the academic portion of our theme...

Playful Learning - 

Eric Carle -


I am still researching music and some documentary films on butterflies to round out our mini "curriculum".  Does anyone have any suggestions for any other fun activities?

Looking forward to a colourful July...
xoxo
 ~ joey ~

father's day card

 Happy Father's Day to all the Dad's out there!

I saw this general idea a while ago somewhere (I think in book?) and knew that we had to try it!
In fact I'm going to do it every year!
Won't it be fun to look back to see how the kids have changed?
(how much smaller the letters begin to look as time passes!?)

This is what I did...

~ Print the letters D-A-D on 3 sheets of white cardstock using regular Word Processing software.  The font is Times New Roman, size 800(!), bolded and outlined.

~ Cut the letters out and "laminate" them (this helps to hold their shape).  I used clear Contact Paper sold in the shelf paper aisle at the hardware store.

~ Photograph the kids with the letters!  If you have more than 3 children you could spell "Papa", "Daddy", "Padre", "Father" or whatever the kids call him.  Or have 2 kids per letter as I did with the letter A.  If Mama is expecting hold one letter in front of her belly!  Onlys, like myself, get to be in all the photos! ;o)

~ I made the card in my Word Processing software as well.  Scroll down to the bottom of the page, insert the photos and type Happy Father's Day underneath.  You could totally go to town with fancy software or use printed photos and scrapbook supplies.  I thought keeping it simple would keep the focus on the kids.

~ I printed the card onto Staples brochure and flyer paper double sided gloss.  (it's reasonably priced and also comes in matte)  I use these papers for everything from greeting cards to educational games, science cards, bookmarks, etc.  The gloss paper is really nice for cards with photographs.

I have seen this idea made into a photo frame as well.  I love how creative you can get with the letters.  They can be made from any medium - paper, wood, felt, clay, wire, metal, foam, cork, cookies!  Or even print the image onto t-shirt transfer paper and make t-shirts for each of the kids!  Face painted letters on their cheeks is another possiblity?!  Oh my I could go on and on!

Please link up your Father's Day cards and gifts, I'm looking for ideas for my Father's Day Pinterest board.

xoxo
~ joey ~

{this moment}

Inspired by soulemama and waldorf mama
"A Friday ritual....capturing a moment from the week. A simple, special, extraordinary moment.
A moment I want to pause, savor and remember."


this week I am thankful for...

~ summer gardens

~ summer plans coming together

~ the many generous people who write blogs

~ snippets of creative time

~ my husband...

Happy Father's Day Honey!

xoxo
~ joey ~

knitting needles and flowers

Is it just me or does that blog title put a smile on your face too?!!


 Well I am pretty happy that my Gran recently passed down her knitting needle collection to me!  I suppose I am the closest one to being a knitter in the family, but I feel very lucky as she taught me how to knit when I was a child!

So gather 'round all of you knitters and please help out a "knitting newbie" at figuring out exactly what all these bits and bobs are!? Obviously I haven't advanced one stitch since my last lesson back in the 80's!  ha ha!


OK, so first of all I really love that the original price tag is still on these needles, the Eaton's store is long gone now, but can someone tell me...
what on earth do you knit with 3/4" needles??!!


A nice reminder of another company long gone.  From the time I was born, 3 generations would do their weekly shop at Woodward's!


I have no idea what these are called but I'm assuming that they hold your work so you can knit another piece without having to buy another pair of needles?


And I love this little wood um....crochet hook?  I just don't know why there is a hook at both ends that are the same size?  Do you use crochet hooks with knitting, Gran seemed to have quite a few?


I was excited (don't ask me why exactly) to find one of these counter thingys on this needle.  Any explanation on how to use one would be greatly appreciated!


 So, if anyone has any more tidbits of information about some of these needles please let me know!

I have a super simple little project in the works that uses those #12's that I'll be sharing very soon!

~ * ~

And now onto something I do know about.... flowers!

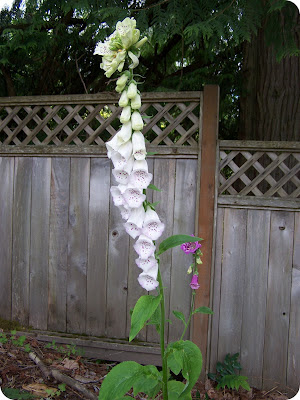
I spotted these volunteer foxgloves on the edge of the drive the other day so before they faded I had to take some photos, aren't they stunning?


Thank you in advance for sharing your needle knowledge with me! ;o)
xoxo
~ joey ~

imagine childhood summer catalogue & giveaway!


If you have never seen one of imagine childhood's beautiful catalogues you are in for a treat today!

They have just released their summer edition and it's full of
SO much goodness! 

PLUS...

they are offering an amazing giveaway that you will want to enter!

Here's how they say it works...

"In order to celebrate the coming of the season, we're giving away a $75 gift certificate to the shop, and if you help us get our Facebook likes to 2000 we'll make that gift certificate out for $150.  Think you can rally enough friends to push our likes all the way to 2500?  Well, then we'll make that gift certifcate a cool $200!  That's a lot of summer fun right there if we do say so ourselves."

So go on, click on one of the links to enter, you can thank me later if you win...!  ;o)
xoxo
~ joey ~


pressing flowers


One fun way to preserve the colours of summer (or in today's case winter pansies!) is by pressing flowers and leaves to be used on cards, bookmarks, or sealed onto just about anything with a bit of Modge Podge.

I have made presses in the past, they are super easy to make and there are scads of tutorials all over the web.  You just need some thin plywood, a drill, 4 carriage bolts and wing nuts, scraps of cardboard and blotting paper (I use thick watercolour paper).


 The little press in the photos I picked up at the Thrift Store for next to nothing but it's great for small projects.  When we have a larger flower garden I will make a larger one.


Layer the flowers between two layers of blotting paper separated by a layer of cardboard.  The paper absorbs any moisture from the flowers as they dry.


You can stack as many layers as you can fit on the length of the carriage bolt.  This press has fairly short 'wooden tighteners' so I can only press 3 layers at a time.


Add the top piece of wood and tighten it up!  Flowers and leaves dry at different rates so I usually take a peak in about 2 weeks....

   
...unless I forget that I've put in some flowers and then, like today, I'm surprised with some ready to use!

Here are a few links to some really inspiring natural cards made with pressed materials...


Happy creating!
xoxo
~ joey ~

weekend moments...

freshly organized spaces...


...delights in the garden...


...and proud Mama moments!


I hope your weekend was filled with things
that made your heart happy!

xoxo
~ joey ~

graph paper word search puzzles


 Recently out of the blue, my little guy gave me the most awesome gift!
He knows I love doing puzzles (crosswords, sudokus, word searches)
so he decided to make me a personalized word search all by himself.

We have all been reading the Harry Potter books by J.K. Rowling so he decided that it would be something that he would enjoy making and I would enjoy doing.  I love it when we understand the same "language"!  I usually can't keep up with all of the books and character's names that they read about.


He used a piece of graph paper and carefully wrote a letter in every square on the sheet!  It contained many of the character's names as well as specific words from the story.(like quidditch)  Then he drew a box next to each word on the list so that I could tick them off as I found them.  He thought of everything, so sweet!

I was told to add any other words that I found in the puzzle to the list.

I'm sure that he didn't even realize how much he was learning from doing this activity.  Starting of course with reading the book and recalling all of the information from the story, but also printing letters, printing some of the words diagonally or backwards, spelling and hand eye coordination. (those grids are tiny!)

This activity is such a great learning tool for children of all abilities.  I think I'll be including these homemade puzzles when planning our themes.
*note:  I discovered doing my son's puzzle that using both upper and lower case letters makes the puzzle even more challenging!


 He worked so hard on this gift I decided to make him a puzzle to do too.
(and sneak in more learning ha ha!)
He was thrilled that he had an opportunity to do a Harry Potter puzzle that he didn't already know the answers to! ;o)

Here's to many more moments of creative learning!
xoxo
~ joey ~

{this moment}

Inspired by soulemama and waldorf mama
"A Friday ritual....capturing a moment from the week. A simple, special, extraordinary moment.
A moment I want to pause, savor and remember."


This week I am thankful...

~ that I watched my girl overcome her fears and run in three events at her school's track meet. (a look of determination before she ran the 400 metre)

~ that the rain held off so that the kids (and parents) didn't get soaked during the event.

~  that our new goldfish now come to the surface when we call them for feeding.

 ~ for the first 3 tiny strawberries that I picked from our 'garden' today.

~ that there is sunshine in the (long term) forecast.

Wishing you a joyful weekend!
xoxo
~ joey ~ 

Please link up your {moment} if you participate too!


math gnomes and watercolour notebooks

After an inspiring chat with Becca about her math gnomes I decided that we had to have these for our summer learning games!

There are so many adorable versions of these little guys shown all over the web (like here),  however, I decided that I really should use some of the materials that I eagerly buy for projects like these, and make a set myself.

So, I modified my wee witch pattern and they came together quite quickly.  I'm sure many of you have made these yourself but for those of you who haven't...

For one gnome you'll need:
2 colours of felt
Wood peg person
2 colours of embroidery floss
embroidery needle
glue
paint (eye colour of your choice)
paint brush
 For the king: use the cape and body pattern and then cut the crown free hand.

For the gnomes: cut 2 body patterns and a hat.

For the body: blanket stitch the bottom with 4 strands of embroidery floss, then using 2 strands embroider the math symbol on the 'stomach'.


For the cape: blanket stitch around the edge.
For the hat: just along the bottom.


Sew or blanket stitch the body onto the gnome. (or you could glue it)


I decided to embroider tiny math symbols all over the hat (optional) then fold it over and blanket stitch the back closed.


Sew the cape on with a few stitches at the neck. 


Glue on the hat.  Dip the paintbrush handle into some paint and dab two eyes.

 And then I made some really quick notebooks for the kids to use with the gnomes. 


 I used two of my husband's Waldorf school paintings (thankfully his mother kept everything!)


 Because the back of the paintings had a bit of paint on it I glued on a sheet of coordinating paper.

Fold all the sheets in half and staple on the fold.

 *note:  I used this kind of stapler.

  
Open up the stapler and staple down on the carpet (or something thick and squishy).  Then bend down the staple points to close the staple.


Now we're all ready for some FUN learning!

I highly recommend checking out Becca's shop MamaWestWind for her woodburned gnomes and wool sewn creations.  She is truly amazing with a woodburner and chooses such lovely colours and finishes!  Perfect for the nature table too!

Thanks for stopping by, have a great day!
xoxo
~ joey ~ 
 
**edit -  As I mentioned, these adorable math gnomes are totally new to me and after reading more about them I have learned that I have the colours all wrong!  This is so like me, jumping in before reading the instructions!  Actually it's just a fluke that I even have the correct colours, I just used supplies that I had on hand! ;o)
So now I have an excuse to make another set!  Yippee! 
If you like to follow tradition the colours should be: 
plus - green
minus -blue
multiply - yellow
divide - red
King equals - purple
(well 1/5 isn't a great score, but it may make a funny math lesson?!)
~ joey ~